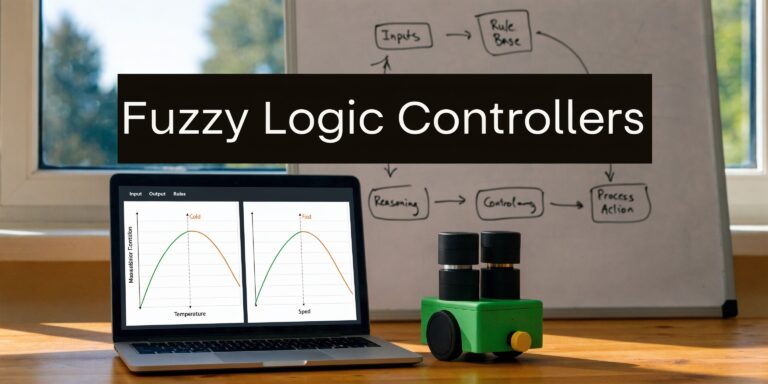
Docker Create Container: A Beginner’s Guide to Smarter Setups
If you've ever wrestled with getting a complex AI project running on a new machine, you know the frustration of "dependency hell." The docker create container command is your secret weapon against this—a powerful, yet often overlooked, tool that lets you prepare a container before it ever starts running. Think of it as building a clean, isolated, and perfectly configured workshop for your code, from the ground up.
Why Prepare a Container Before Running It?
When most of us start our Docker journey, we learn docker run. It's quick, easy, and seems to do everything we need. But as you dip your toes into more complex applications, especially in the AI and machine learning world, jumping straight to run can feel a bit like trying to cook a gourmet meal by throwing all the ingredients in a pan at once. This is exactly where docker create container comes in to save the day.
I like to think of it as setting up a workbench before starting a complex project. You wouldn't just dump all your parts and tools in a pile and hope for the best, right? You’d lay everything out, organize your components, and make sure you have what you need, right where you need it. docker create lets you do the same for your digital environment.
The Power of a Pre-Configured State
Creating a container without starting it gives you a "created" but inactive container. All its configurations are defined and locked in, but no code is running yet. This gives you a super valuable window to define everything upfront:
- Persistent Data: You can attach specific volumes to make sure your precious AI models, large datasets, and training scripts don't vanish when the container is stopped or removed.
- Network Connections: It's the perfect time to configure exactly how the container will talk to the outside world or other services. For example, you can map the port for a Jupyter Notebook or an API endpoint.
- Environment Variables: You can securely inject sensitive information like API keys or configuration flags without hardcoding them directly into your image (which is a big no-no!).
This two-step process—create, then start—is a massive advantage for beginners and pros alike. It lets you build the container, inspect it to confirm every single setting is correct, and only then bring it online. This simple, deliberate approach cuts down on those frustrating "it works on my machine" moments and makes finding and fixing bugs far more predictable.
Expert Opinion: In any serious MLOps pipeline, we almost never run a container without creating it first. This staging step is essential for quality assurance. We can run automated checks against the created container to verify its configuration before it ever touches production data, preventing countless deployment headaches. It's a simple habit that pays off big time.
Ultimately, docker create container encourages a proactive, intentional workflow. You're no longer just running code; you're building a reliable, reproducible home for your AI applications. It's a foundational skill for anyone serious about packaging software, from a simple model training script to a sophisticated multi-service app.
Docker Create vs. Docker Run: What's the Difference?
One of the first questions I hear from developers new to Docker is, "Should I be using docker create or docker run?" It's a fantastic question, and getting the distinction is key to becoming a container wizard. The choice really boils down to your immediate goal: control or speed?
At its core, the difference is about combining actions. docker run is a handy two-in-one command, while docker create separates those actions into distinct, deliberate steps.
Let's use an analogy. docker create is like assembling all the parts for a new PC. You carefully place the motherboard, install the RAM, and connect the hard drives. The machine is built and ready, but it's not powered on. It just sits there, perfectly configured and waiting for your command.
In contrast, docker run assembles the PC and hits the power button in one swift motion. It creates the container and immediately starts it.
Docker Create vs. Docker Run At a Glance
This table gives a quick rundown to help you decide which command fits your needs.
| Feature | docker create |
docker run |
|---|---|---|
| Primary Action | Creates a new, writable container layer from an image. | Creates a new container and starts it. |
| Container State | Created (stopped) |
Running (or Exited if the command finishes) |
| Main Use Case | Pre-configuring a container before its first run; staging complex setups. | Quickly running an application or a one-off task. |
| Workflow | Two-step process: 1. docker create 2. docker start |
Single-step process. |
| Best For | Complex setups, critical production applications, and anyone who likes to double-check their work! | Development, quick tests, and simple applications. |
Ultimately, choosing the right command is about control versus convenience. docker create gives you a crucial moment to pause and inspect, while docker run gets you going immediately.
When to Create Before You Run
So, when does this separation actually matter? The magic of docker create really shines when you're dealing with complex setups or critical, long-running services where you can't afford mistakes.
Imagine you're setting up a database container. You absolutely need to get the volume mounts, network settings, and environment variables for passwords and configurations right before it ever starts. A mistake could lead to data loss or a security vulnerability.
This is the perfect scenario for docker create. You can:
- Define all the volumes to persist your database files.
- Attach it to a specific user-defined network.
- Pass in sensitive credentials as environment variables.
Once created, the container just sits in a Created state, consuming no CPU or memory. This gives you a priceless window to run docker inspect on it, double-check every single setting, and verify that your configuration is flawless. When you're ready, a simple docker start brings it to life with full confidence.
This decision-making process is a fundamental part of a solid container workflow.

The flowchart here nails it: if you need to set up and verify first, docker create is your tool. If you just need to get something running fast, docker run is the way to go.
In my work as an MLOps engineer, we lean on
docker createheavily. We use it to stage containers for model training or inference, letting us validate the environment, data mounts, and GPU settings before kicking off a job that might run for days. It’s a non-negotiable quality gate for us.
For a quick test or a simple web server, docker run is perfectly fine and much faster. But for deliberate, controlled deployments, docker create gives you the power to get it right the first time.
Of course, create and run are just the beginning. As you scale, you'll inevitably look into orchestration tools. If you're curious about what comes next, understanding the difference between Kubernetes and Docker is a great place to start.
Creating and Starting Your First AI Container

Alright, enough talk! Let's get our hands dirty. The best way to build confidence with Docker is to dive right in. We'll walk through creating and running your first containers, starting simple and then building up to a container tailored for a basic AI application.
Container adoption has been massive, with some reports showing it as high as 92% across the IT industry. For anyone working in AI, mastering container creation is no longer optional—it's essential for creating consistent and portable environments for training and inference.
Your First Basic Container
Let’s start with a classic: creating a barebones container from the official Ubuntu image. This is a safe, simple way to see the docker create command in action without any complicated moving parts.
Pop open your terminal and run this:
docker create ubuntu
Once you hit enter, Docker checks if you have the ubuntu image locally. If not, it pulls it down from Docker Hub and then creates a new container from it. The command will spit out a long string of characters—that's the unique Container ID.
Right now, that container is just sitting on your system, completely inactive. Think of it as a pre-configured virtual machine that's powered off, waiting for you to tell it what to do.
Creating an AI App Container
Okay, that’s the basic idea. But how does this apply to an AI project? Let's create a container for a hypothetical machine learning app. A pro tip right off the bat: always give your containers memorable names. You'll thank me later!
We'll create one named my-first-ai-app. This is far easier to work with than trying to copy and paste that long container ID every time.
docker create --name my-first-ai-app python:3.9-slim
Here’s a friendly breakdown of what we just did:
docker create: This is our main command for making a new container.--name my-first-ai-app: This flag assigns a human-readable name. Seriously, do this every time.python:3.9-slim: This tells Docker which image to use. The-slimversion is a lightweight Python 3.9 image, perfect for keeping our AI application lean and fast.
Just like that, you have a container named my-first-ai-app ready to go, complete with a pre-configured Python environment.
Expert Tip: Using specific image tags like
python:3.9-sliminstead of justpythonis a critical best practice. It locks in your environment, ensuring your application is reproducible and won't unexpectedly break when a newer "latest" version of the Python image is released.
Bringing Your Container to Life
Your container exists, but it isn't actually doing anything yet. To get it running, you use the docker start command, referencing the nice, friendly name you assigned it.
docker start my-first-ai-app
The container is now running in the background. But how do you know? The docker logs command is your window into the container, showing you any output from the process running inside.
docker logs my-first-ai-app
Because our container isn't set up to run a specific script, you likely won't see any output. However, as you begin packaging your own AI models, this command will become your go-to tool for debugging.
This two-step workflow—create then start—gives you precise control over your application's lifecycle. If you want to dive deeper into the fundamentals, this hands-on Docker container tutorial for beginners is a great resource. And to see where these skills can take you, our guide on machine learning model deployment shows how containerization fits into the bigger picture.
Configuring Containers for Real-World AI Projects

Once you've nailed the basic docker create command, you're ready for the fun part: building containers that actually do useful work in a machine learning environment. This is where we move beyond simple "hello world" examples and configure powerful, isolated environments for real AI projects.
Think of these configuration flags as the difference between getting an empty room and a fully-equipped lab. You're not just creating a space; you're defining where the power outlets go, what data is available on the bench, and how it connects to the outside world.
Exposing Your AI Application with Port Mapping
So you have a service running inside your container—maybe it's a Jupyter Notebook for interactive analysis or a Flask API serving model predictions. How do you actually talk to it from your own machine? This is where port mapping comes to the rescue.
The -p (or –publish) flag is your best friend here. It creates a network tunnel from a port on your host machine directly to a port inside the container.
For instance, here's how you’d set up a container for a Jupyter Notebook. This command maps port 8888 on your machine to the container's port 8888.
docker create --name my-notebook -p 8888:8888 jupyter/scipy-notebook
After you run docker start my-notebook, you can just open your browser to http://localhost:8888 and get instant access to the Jupyter environment. It’s all running securely inside its own isolated world. Easy!
Making Data and Models Persistent with Volumes
Here’s a hard lesson many of us learn too late: a container's internal filesystem is temporary. If you remove the container, all the data inside—trained models, datasets, logs, you name it—is gone forever. For any serious AI work, that’s a deal-breaker.
The solution is volumes. The -v (or –volume) flag lets you mount a directory from your host machine right into the container's filesystem.
Let’s imagine your Python scripts and datasets live in a local folder called project_data. You can link it directly to a container running a TensorFlow image like this:
docker create --name my-training-job -v /path/to/your/project_data:/app/data tensorflow/tensorflow:latest-gpu
Now, anything your script saves to the /app/data directory inside the container is actually being saved to the project_data folder on your computer. Your trained models are safe and persistent.
Expert Insight: I always use absolute paths for my volume mounts (like
/Users/myname/projects/my-ai-appinstead of./my-ai-app). It removes any doubt about where the data is coming from, which is critical for reproducibility and avoiding those frustrating "file not found" errors hours into a training job.
Securely Managing Configuration with Environment Variables
Hardcoding sensitive info like API keys, database credentials, or model configuration directly into your code is a massive security risk and a maintenance nightmare. A much better practice is to pass this information in as environment variables using the -e (or –env) flag.
This technique separates your configuration from your application logic, making your container image more portable, secure, and easier to manage.
Here's a practical example for an API server:
docker create --name model-api -e API_KEY="your-secret-key" -e MODEL_VERSION="1.2.3" my-custom-api-image
Inside the container, your application can pull these values directly from the environment. This is a foundational practice for building professional, secure AI services. And if you're working with more advanced cloud-based AI, you might find our guide on mastering Google Cloud's Gemini and AI Studio tools helpful.
This separation of configuration is exactly why docker create is so powerful for MLOps. It allows you to define a standardized container configuration once and then start it on demand, which is essential for standardizing ML lifecycles and creating isolated sandboxes for model development.
A Beginner's Guide to Managing Your Created Containers
Alright, so you've used docker create to build a container. That’s a great first step! But the real skill comes in managing that container through its entire lifecycle. Knowing how to create something is one thing; knowing how to see it, check its health, and clean up after it is what separates a beginner from someone who truly commands Docker.
Listing All Your Containers (Even the Hidden Ones)
First up, how do you even see the containers you’ve made? If you run docker ps, you'll only see what’s currently running. This can be misleading because it hides any containers you created but haven't started yet.
To get the full picture, you need to add the -a flag (think "all").
docker ps -a
Think of this as your master list. It shows every single container on your system—those in a Created state waiting for instructions, those actively Running, and any that have Exited after completing a task.
Diving Deep with Docker Inspect
Now for a command that feels like having x-ray vision: docker inspect. This tool dumps a massive, detailed JSON file containing every single configuration detail about your container.
Why is this so incredibly useful? Imagine you’ve mapped a port, but the connection keeps failing. Or maybe a volume mount isn’t working, and your AI model can’t find its training data. docker inspect is your first and best stop for troubleshooting.
docker inspect my-first-ai-app
Running this will show you the container’s IP address, all its port mappings, the exact paths for its volume mounts, and every environment variable it knows about. It’s the absolute source of truth for your container's setup and a lifesaver for debugging.
As more developers embrace containers, proper oversight becomes non-negotiable. It's predicted that by 2026, the docker create container command will be a cornerstone of efficient home labs. But here's a word of caution: with around 60% of users reporting security incidents and 47% admitting to deploying vulnerable containers, diligent inspection is more critical than ever. You can explore why this is so vital in a detailed report on the future of containerization.
Starting, Stopping, and Tidying Up
Managing the day-to-day state of a container is thankfully straightforward. You already know how to kick off a container you’ve created, but here’s a quick rundown of the core lifecycle commands:
docker start <container_name>: This brings a stopped or newly created container to life.docker stop <container_name>: This sends a signal to gracefully stop a running container.
Most importantly, you have to be diligent about cleaning up. Old, stopped containers just sit there, consuming disk space and creating clutter. The docker rm command is your tool for permanently removing them.
docker rm <container_name>
One thing to note: you can only remove a container that is already stopped. If you try to remove a running one, Docker will throw an error. You can force it with the -f flag, but it's always better practice to stop it first.
My Personal Pro Tip: Whenever I'm running a temporary task—like a quick data processing script or a build process—I always use the
--rmflag withdocker run. This tells Docker to automatically and completely remove the container the moment it exits. It’s a simple habit that has saved me countless hours of manual cleanup and keeps my system from getting bogged down with forgotten containers.
Mastering these simple commands is what gives you confidence and control over your environment, a core skill for any successful deployment in cloud computing.
Common Questions About Creating Docker Containers
Once you start using the docker create command, a few questions almost always pop up. I've seen these trip up developers and AI practitioners alike, so let's clear up some of the most common points of confusion to get you building containers with confidence.
What Happens to a Container After I Create It?
When you run docker create, you're essentially assembling the container and placing it on your system's shelf. It exists, but it’s in a "created" state—completely powered down. Think of it as a fully built computer that’s still unplugged.
It has its own writable filesystem layer right on top of the base image, all set to go. But since it's not running, it isn't consuming any CPU or memory. You can see this dormant container by running docker ps -a, which shows you all containers, not just the ones that are currently active.
Can I Change a Container's Configuration After Creation?
This is a big one, so I'll be direct: no, you cannot change most core configuration settings once a container is created. The whole point of docker create is to lock in a specific, unchanging configuration before the container ever starts.
Expert Opinion: The fact that you can't change a created container is a feature, not a limitation. It enforces a disciplined approach where your environment is defined explicitly from the start. This guarantees consistency every single time you run it, which is the cornerstone of reproducible AI experiments.
If you realize you’ve made a mistake—maybe you forgot a port mapping, used the wrong volume, or flubbed an environment variable—the only way forward is to remove the container with docker rm and create a new one with the right settings. It's a clean-slate philosophy that keeps things reliable.
Why Use Docker Create Instead of a Dockerfile?
This question often comes from a slight mix-up between images and containers. They sound similar, but they serve very different purposes.
A Dockerfile is a blueprint for building a custom image. It’s like the architectural plan for a house, defining every material and structural detail. You run
docker buildon a Dockerfile to produce that image.docker createis what you use to stamp out a runnable container from an existing image. That image could be a generic one you pulled from Docker Hub (likepython:3.9-slim) or the custom one you just built with your Dockerfile.
The workflow always goes in this order:
- (Optional)
docker build: Use a Dockerfile to create a custom, static image with your code and dependencies. docker create: Instantiate a new, writable container from an image.docker start: Run the container you just created.
They aren't alternatives to each other; they're two essential, sequential steps for packaging and running your applications.
At YourAI2Day, our mission is to make complex AI topics practical and easy to grasp. To keep learning and see what’s new in the field, check out the latest news and tools on https://www.yourai2day.com.